


Hey peopleeeeeeeeeeeeeeeeeeeeeeeeeeeeeeeeeeeeeeeeeeeeeeee.....

We wrote our first article, and it was amazing... The likes, the comments, everything was amazing. Guess what is gonna be much more amazing than the first article? This oneeeeeeeeeeeeeee..
For those that are just joining us for the first time, y'all welcome. We started this series by introducing and explaining blockchain to people, we learned a lot of concepts and eventually built a simple decentralized application. We are taking things forward in this tutorial. We would be building a simple wallet system.
For this project, tools we would be using includes:
- Truffle
- Metamask
- openzeppelin npm package
In part one of this article, we built our application mainly by hardcoding our values. We had just one private key that would be handling all of our transactions. The whole concept of that article was to show you how things worked when it comes to blockchain development.
One of the beauties of blockchain application and not only that, every other application is making it open to everyone to use. That wasn't possible because we made use of only one private key which was ours, and so only the owner had access to the application. For this application, we would be exposing it to the entire world (i.e pushing it to production), we want everyone to be able to use it with their own private key, we don't want to give our private key to everyone to use it. This is where Metamask comes in. Let's not get too ahead of ourselves.
Also, to write our contract, we would be leveraging the openzeppelin-solidity package. Since solidity has evolved, there are certain standards we must follow to write smart contracts in Ethereum, one of which is the popular ERC20 token. We have others such as the ERC721, ERC1155 which are popular amongst smart contracts for NFTs. These protocols/standards are necessary so that different wallets can effectively interact with other wallets in the Ethereum blockchain. The openzeppelin package provides us with all of those standards that we can directly import into our smart contracts helping us reduce the stress of writing our ERCs ourselves. Over in the next articles, we would learn how to write ERCs, but for now, let's do it the easy way.
Let's dive right in.

If you remember, during migration in our previous project, we used the deploy script and we set it manually. Here, thanks to Truffle we just need to add three lines of code and it would help with all the contracts deployments for us.
Go ahead and create a new project folder (name it whatever you like). Once you have done so, go ahead and initialize Node on the project. Open your command line and type npm init -y.
We would also want to initialize Truffle in our project. If you don't have Truffle installed on your system go ahead and do so by typing npm install -g truffle.
This would install truffle on your computer. The 'g' gives the instruction to install truffle as a global package (of which it is), this way you can be able to initialize truffle on another project on your system without having to install it again. Once it is successfully installed, type 'truffle init'.
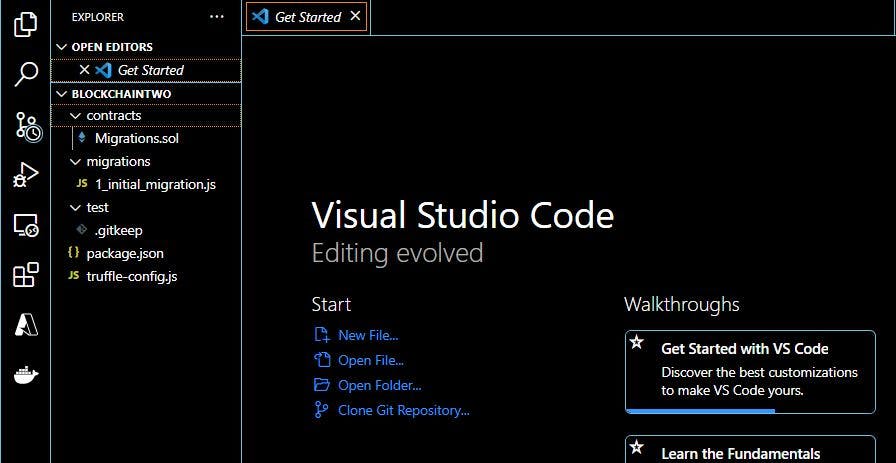
Open your project folder you would see new folders and files created for you. Truffle gives us a whole lot of advantages, for example, in your project, you should see a contract folder, this is where it is expected that you store all of your solidity files that contain your smart contracts. You can also see a migration folder this is where all your migrations are stored. What migration does is basically enable us to push our smart contracts (written in the contracts folder) to the Ethereum blockchain and help set up necessary steps for linking contracts with other contracts as well as populating contracts with initial data. When you run the migration command, truffle comes to this folder and runs all the JavaScript files in order, as against running our migrations manually as we did in the previous article, using the deploy script. Life shouldn't be that hard.
Every solidity file you create should have a corresponding JavaScript file in his folder for migrations. Truffle runs this folder orderly, as you can see above the migration file generated by the console has number 1 in it, then the name of the migration file is separated by an underscore, in the same way, every file you save in this folder should follow the numeric order i.e the next files saved should look like '2_secondname.js', '3_thirdfile.js' e.t.c. Truffle would then run the first, once it is done, it would move to the second, and the next, it would continue in this manner till it is done running all migration files.
You can also see a test folder, which is empty for now. It is expected that you write and save all of your test files inside this folder.
There is also, a truffle.config file which contains all the configurations necessary for truffle. Beyond all these, Truffle also gives us a command line to interact with our project (truffle console)

So like I said, we would be using Openzeppelin packages. Go to your console and type in 'npm install @openzeppelin/contracts' to install Openzeppelin into your project.
Let's write a new smart contract. Create a file in your contracts directory and name it Token.sol. In your file, write the following contracts.
pragma solidity 0.5.16;

import "@openzeppelin/contracts/token/ERC20/ERC20.sol";


contract TutorialToken is ERC20 {

  string public name = "TutorialToken";
  string public symbol = "TT";
  uint256 public SupplyAmount = 10000000000;

  constructor() public {
    _mint(msg.sender, SupplyAmount);
  }
}
In the above code, in the first line what we do is tell the truffle what solidity version we want to run on. In our case, we specify version 0.5.16.
In the next line, we import the ERC20 token using openzeppelin. What openzeppelin does is provide security products to build, automate, and operate decentralized applications. It also gives us access to all ERC standards available; in our case, we use it to import the standard ERC20 token into our contracts. An ERC20 token is a standard used for creating and issuing smart contracts on the Ethereum blockchain. It is used for all smart contracts on the Ethereum blockchain; it provides us with the basic functions that a token must have for token implementation and provides a list of rules that all Ethereum-based tokens must follow.
In the next line, we define our smart contract. We called it Tutorial Token and this token is inherited from the ERC20. For line 3, Truffle would first compile the ERC20 token and then compile the Tutorial Token contract, this way our token contract is able to inherit from the ERC20 token.
We then define our token name, token symbol and the amount of tokens that are available. The name and the symbol are part of the symbol that is defined in the ERC20 token. It is expected that every token is to have a name, symbol, balanceOf (which we are tweaking to SupplyAccount in our case), transfer, transferFrom e.t.c.
We have called our token Tutorial Token and we have give it a symbol TT. We havealso specified a supply amount of 10000000000.
Afer we are done with declaring our state variables, we then want to assign the initial value to the contract owner. It is good to know that the person that deploys a smart contract is the owner of a contract.
To do that, we made use of two functions: mint and the constructor function. Constructor is a function that is called as soon as a program is executed for the first time. So it is triggered as soon as the program runs successfully. The mint function is a function defined in ERC20. It is accessible because our smart contract is inheriting from our ERC20. What the mint function does in particular is mint a particular token supply amount into the smart contract owner. The owner can be gotten in solidity through the msg.sender keyword.
The next thing we would be focusing on is migrating our smart contract. Go to the migrations folder and create another file. You can call it 2_deploy_contracts.js.
The code in this file would be similar to the sample migration file that truffle gave to us, but in this case we would require our Tutorial Token contract as against the Migrations contract. Migrations with truffle is easier to implement. As we can see, all we need to write are three lines of code and we should be good to go, as against using SOLC (solidity compiler) to get our artifacts first before being able to deploy.
So go to the file and type in:
var TutorialToken = artifacts.require("./TutorialToken.sol")

module.exports = function(deployer){
    deployer.deploy(TutorialToken)
}
In the first line, we declare a variable that would get the artifacts from the solidity file, we then use the artifacts to deploy our smart contracts to the blockchain.
To deploy, we would need to first compile our contracts, although while deploying our contracts, truffle firsts compile it for us before it initiates deployment, it is good practice to first compile your contracts before deployment.
We would need to download Ganache. What is Ganache? Ganache is used for setting up a personal Ethereum Blockchain to deploy contracts, develop your applications, and run tests. It gives you the ability to perform all actions you would on the main chain without the actual cost as it provides for you test ethers which is what you would use to pay for every contract that you run. You can download Ganache here. Once you are done downloading Ganache, you can go ahead and set it up and start it. One last thing before we deploy our contracts, go to your truffle config file in your project.
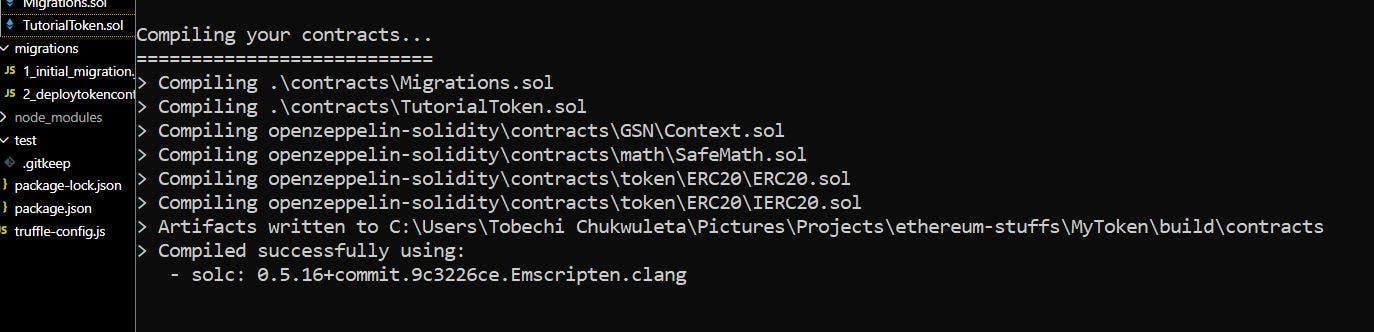
Open your command line, and type, 'truffle compile'. If your contract compiles successfully, you should see an output similar to the image shown below.
Once your contract successfully compiles, you can go ahead and deploy your contract. Still, in the same command line, type the command, 'truffle migrate', this should deploy your contract to the blockchain; in our case, Ganache. P.S: Migration
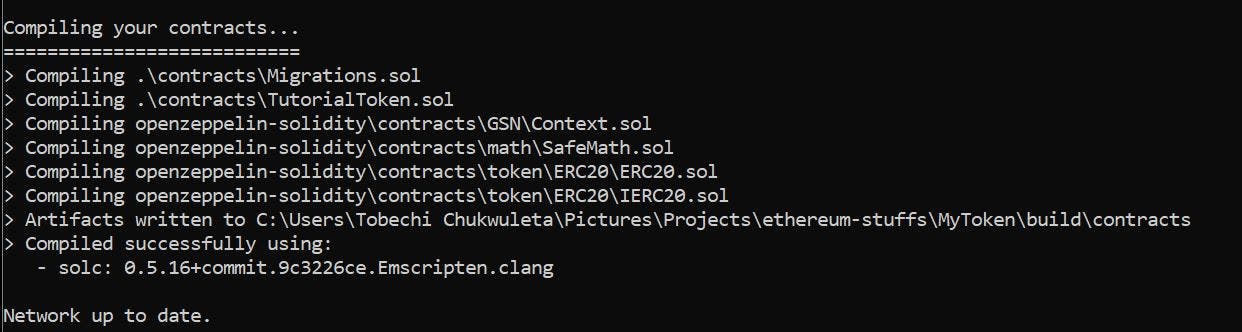
If you notice in my own, it is showing Network up to date, this is because I have already deployed my contracts. Since there were no changes made on my solidity file, there was nothing to redeploy, that is why for me it was up to date. If you run it at your end, you would see what a successful migration looks like, showing you the steps or process through which the truffle compiles your contract.
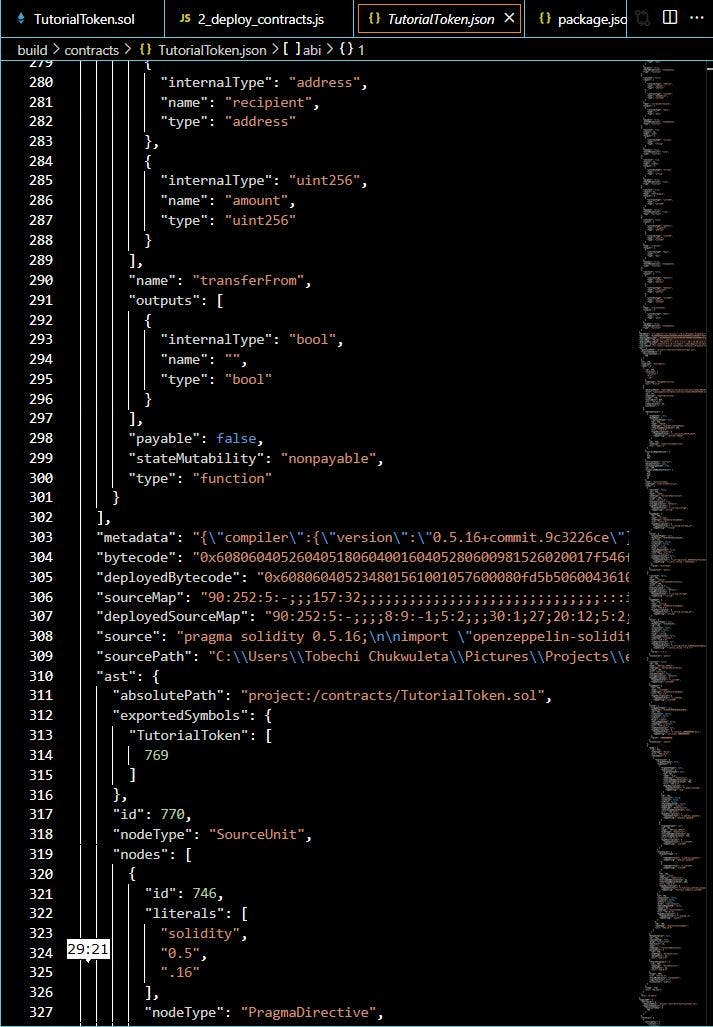
You would see a new folder called 'Build' created in our project. This folder contains the JSON format of all our deployed solidity files. Each of these JSON files contains a lot of functions provided to us by Truffle such as ABI, bytecode, ast, e.t.c. As you can see in the image below how long the file is.
Now the fun part. Remember we are building a simple wallet system, let's create the frontend for our application. Well, we won't be building the frontend by ourselves, I would just paste the codes to the HTML file that I have already written. Just a few lines of code should be easy to understand. We would write the Javascript file together (that's the whole essence, learning how to use vanilla JS to build a blockchain application). Also note, we would be using Bootstrap for our CSS.
Let's structure our code well. Create a folder in your project directory and name it 'client'. You can give it whatever name that you want to give it. In the folder create two more folders, name one CSS and the other JS. The CSS folder would contain all our CSS-related contents. The good news is that in this project we would be working with bootstrap, so we wouldn't need to write any CSS code, All you need is bootstrap.min.css in the CSS folder.
Create a new file in our client folder and name it index.html, write the following code inside your index.html file.
<!DOCTYPE html>
<html lang="en">
<head>
    <meta charset="UTF-8">
    <meta http-equiv="X-UA-Compatible" content="IE=edge">
    <meta name="viewport" content="width=device-width, initial-scale=1.0">
    <title>Blockchain Wallet Tutorial</title>
    <link href="css/bootstrap.min.css" rel="stylesheet">
</head>
<body>
    <div class="container">
        <div class="row">
            <div class="col-xs-12 col-sm-8 col-sm-push-2">
                <h1 class="text-center">Wallet Tutorial</h1>
                <hr />
                <br />
            </div>
        </div>

        <div class="col-sm-6 col-sm-push-3 col-md-4 col-md-push-4">
            <div class="panel panel-default">
                <div class="panel-heading">
                    <h3 class="panel-title">The Wallet</h3>
                </div>
                <div class="panel-body">
                    <h4>Balance</h4>
                    <strong>Balance</strong>: <span id="TTBalance"></span> TT<br/><br/>
                    <h4>Transfer</h4>
                    <input type="text" class="form-control" id="TTTransferAddress" placeholder="Address" /><br />
                    <input type="text" class="form-control" id="TTTransferAmount" placeholder="Amount" /><br />
                    <button class="btn btn-primary" id="transferButton" type="button">Transfer</button>
                </div>
            </div>
        </div>
    </div>

    <script src="https://ajax.googleapis.com/ajax/libs/jquery/1.12.4/jquery.min.js"></script>
    <script src="js/bootstrap.min.js"></script>
    <script src="js/web3.min.js"></script>
    <script src="js/truffle-contract.js"></script>
    <script src="js/app.js"></script>
</body>
</html>
Right click on the index.html file in the folder panel and open with live server, once the server is started, you should see something like this:
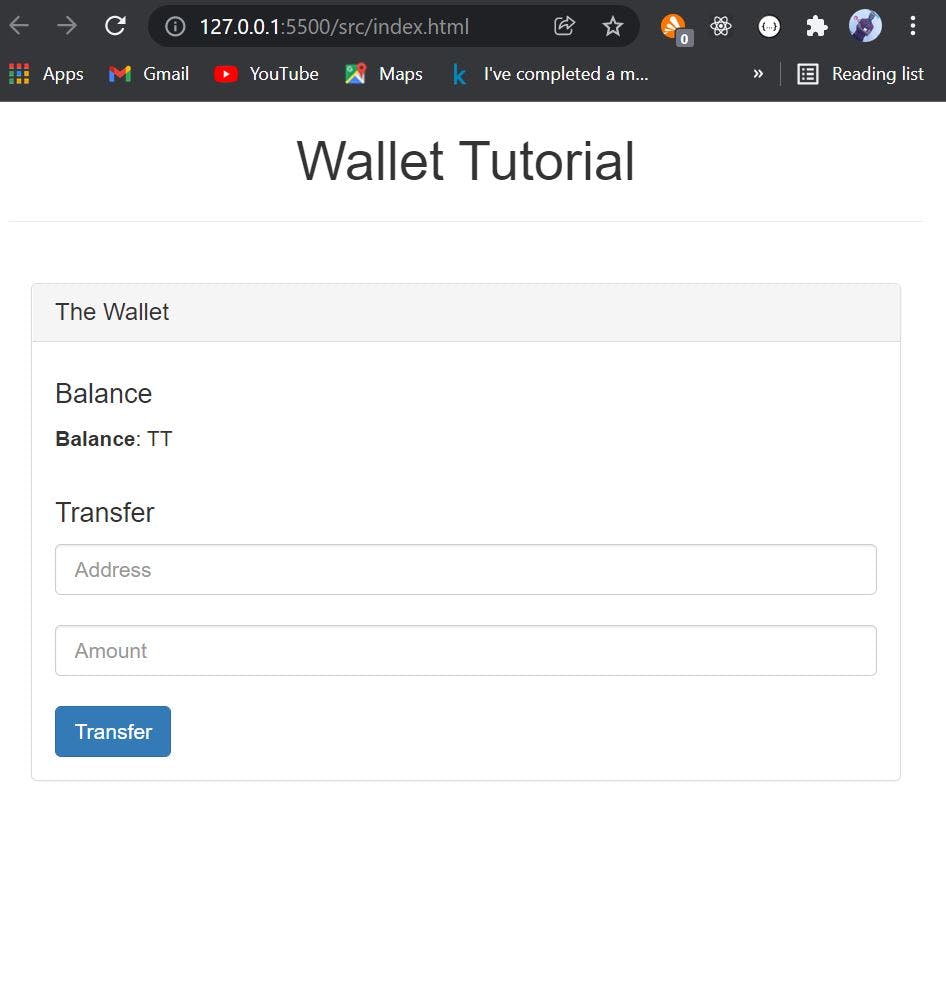
And now the interesting part.

We are going to be handling the Javascript aspect of our project, this is where we would initialize our interaction with the Ethereum blockchain using web3 and Metamask. But before we get ahead of ourselves, what is web3, and what is Metamask?

There is and there would continue to be great content relating to these two concepts. Web3, in the context of Ethereum, refers to decentralized applications that run on the blockchain. Web3 is just a collection of libraries that allow you to connect to a local or a remote Ethereum node using HTTP, or any other platform. Meaning that it serves as the middleman or the bridge between our application and the blockchain system.
Cool yea? So what is Metamask then?
MetaMask is a software cryptocurrency wallet used to interact with the Ethereum blockchain. It allows users to access their Ethereum wallet through a browser extension or mobile app, which can then be used to interact with decentralized applications.
Metamask is a software wallet that makes interactions with the blockchain much easier. It serves as the intermediary between the blockchain and you. It serves as the security layer as well as the accessibility layer. Relating it to a real-life scenario, imagine walking into a grocery store to get groceries. When done selecting the items that you want to purchase, you head to the cashier and give your card for swiping, this way they are able to debit from your account through their P.O.S machine with your card. This is possible because of the numbers present on the card, the POS system reads these numbers (including CVV and the expiry year) and is able to perform a transaction linked to your personal account via these numbers. In this scenario, the numbers on the card are the data, and the ATM card is how you use them. In Metamask, your private keys are the data and the browser's extension is the way that you use them.
One advantage of Metamask is that it allows you to create a new wallet, you just need to add a new account and Metamask would provide you with a new private key which is equivalent to a new wallet account. Metamask makes it easy to switch back and forth between different private keys/wallets. Beyond creating multiple wallet addresses, Metamask is also great at allowing you to import or connect to another wallet that you already have. To understand more about private keys, I'd advise that you go read on Ethereum wallet, definitely, you would learn a lot regarding private keys. One thing to note is that private keys are Ids to a particular wallet system, this is personal to the owner, because anyone with any wallet's private key, can do anything with that wallet.
For us to be able to continue with our project and eventually create our wallet system, we would need to install Metamask in your browser. For Metamask installation, please follow this link.
Once you are done installing Metamask, let's head back to our project. Let's get started with our Javascript codes. Let's create a file in our JS folder, let's name it app.js. Our app.js file that we would be writing is similar to the interact.js file that we wrote in the part one of this tutorial.
App = {
    web3Provider: null,
    contracts: {},
    web3js: null,

    init: function() {
        return App.initWeb3()
    }
}
We first start by defining a class of which we would store all the methods we would be using. What we basically did was initialize all our web3 related functions and set them to null. We set our Web3Provider to null, we set web3js to null, and also our contract to an empty object. All these we would define later as we move. We then called a method Init, what this method would do is to initialize our App. To make life easier for us, we would use the Init method to call the method that actually initializes web3 for us, such that when we call the init method, we automatically initialize web3 in our application.
App = {
    web3Provider: null,
    contracts: {},
    web3js: null,

    init: function() {
        return App.initWeb3()
    },

    initWeb3: async function() {
        if(typeof window.ethereum !== 'undefined'){
            App.web3Provider = window['ethereum']
        }
        App.web3js = new Web3(App.web3Provider)
        return App.initContract()
    }
}
we initialized our web3. What did we do? we checked if the window (i.e the browser) has an Ethereum system; in our case, we checked if the Ethereum is not undefined. Apart from being a wallet, another thing Metamask does for us is to inject an Ethereum object into our browser, so for as long as we have Metamask installed in our browser, it would always be defined, but if we don't have Metamask installed our window, Ethereum would be undefined because we do not have any Ethereum in our browser.
Since we have now set our web3 provider to Ethereum blockchain, we can then define our web3js. Instead of null, we set it to an instance of web3 passing in our web3 provider as the parameter. Once we are done, we call the next method, which is the method we would use to initialize the contract.
As you can see we call/return the next method in the previous method, and if you backtrack you would find out that everything has the init method as the parent method. So when we call the Init method, we basically have access to all the available methods in our Javascript file.
Let's initialize our contract.
App = {
    web3Provider: null,
    contracts: {},
    web3js: null,

    init: function() {
        return App.initWeb3()
    },

    initWeb3: async function() {
        if(typeof window.ethereum !== 'undefined'){
            App.web3Provider = window['ethereum']
        }
        App.web3js = new Web3(App.web3Provider)
        return App.initContract()
    },

    initContract: function(){
        $.getJSON("TutorialToken.json", function (data) {
            var TutorialTokenArtifact = data
            App.contracts.TutorialToken = TruffleContract(TutorialTokenArtifact)
            App.contracts.TutorialToken.setProvider(App.web3Provider)
            return App.getBalances()
        })
        return App.bindEvents()
    }
}
We are done initializing our contract. How did we do it? Remember we initially set our contract to an empty object, it won't be so anymore. Remember when we deployed our contracts using truffle migrate, certain Javascript files were created containing our artifacts. We then used the JQuery syntax to get our tutorial token JSON file which is the name of the solidity file that we created in our project. We used a callback version to obtain all the data that are contained in the JSON file and we stored the data in a variable called Tutorial Token Artifact. The next thing we did was to populate our contract (Tutorial Token contract), as that is where the smart contract of our wallet is in. We did that by using the Truffle Contract function and passing the artifact as a parameter, this way truffle extracts all the required contract methods and stores them in our contracts. The last thing we did was to define our web3 provider in our contracts. We have already defined our web3 provider, so all we need to do is to pass in the defined web3 provider that we declared.
Capisce?

We then call two other functions. Since we have defined our contract and we already instantiated balance while writing our smart contract we have access to the balance of our smart contract, and not only the balance but every other declaration that we made while writing our smart contract. For now, what we need is just the balance, let's, therefore, get the balance.
We also call a bind events method this would be the method responsible for handling all of our transactions in our wallet system.
App = {
    web3Provider: null,
    contracts: {},
    web3js: null,

    init: function() {
        return App.initWeb3()
    },

    initWeb3: async function() {
        if(typeof window.ethereum !== 'undefined'){
            App.web3Provider = window['ethereum']
        }
        App.web3js = new Web3(App.web3Provider)
        return App.initContract()
    },

    initContract: function(){
        $.getJSON("TutorialToken", function (data) {
            var TutorialTokenArtifact = data
            App.contracts.TutorialToken = TruffleContract(TutorialTokenArtifact)
            App.contracts.TutorialToken.setProvider(App.web3Provider)
            return App.getBalances()
        })
        return App.bindEvents()
    },

    bindEvents: function(){
        $(document).on('click', '#transferButton', App.handleTransfer)
    },

    handleTransfer: function(event){
        event.preventDefault()

        var amount = parseInt($('#TTTransferAmount').val())
        var toAddress = $('#TTTransferAddress').val()
        var tutorialTokenInstance

        App.web3js.eth.getAccounts(function(error, accounts) {
            if(error){
                console.log(error)
            }
            var account = accounts[0]

            App.contracts.TutorialToken.deployed()
            .then(function(instance) {
                tutorialTokenInstance = instance
                return tutorialTokenInstance.transfer(toAddress, amount, { from: account, gas: 100000})
            })
            .then(function(){
                alert('Transfer Successful!')
                return App.getBalances()
            })
            .catch(function(err){
                alert('Transfer was not successful')
                console.log(err.message)
            })
        })
    }
}
woooppsss...... Let's take this one at a time.
We first implemented the bind events method. Whenever the user clicks on the transfer button, this method is called, this method also calls the handle transfer method, which is the main method that we have implemented which would be solely responsible for handling the user's transaction.
In the handle transfer method, we get the value of the amount input field from our HTML, we convert it to integer so as to enable us to work easily with it. We also get our destination address which is the address input in our HTML file. With this two, we can be able to transfer money. But, these two fields do not guarantee a transaction as we would need to state where our wallet is going to withdraw the stipulated amount from in order to send it to the receiving end. To be able to get the account, we use a function available to us via web3 which is the get accounts function. This function returns the lists of all accounts that are available. Since we are working with Ganache, the get accounts function would return the 10 accounts that are available to us. But you cannot send money from 10 accounts at a go, that is why we need to pick one from which we would be performing our transaction, and we picked the first account. We were able to pick the first account using array indexing i.e accounts[0].
Now all the parameters needed for a transaction are available to us. We can then start performing our transactions such as sending money, checking our balance. But remember, when we deployed the smart contract it gave us contract JSON files that contained all of these functions, we can therefore be able to access all the functions through the deployed contracts. The next thing to do was to create an instance of the deploy Tutorial Token smart contracts and perform all of our operations therein.
That was what we did next. We used a promised call to get an instance of the deployed contract, through that instance we were able to access the transfer function of which we called. We passed in the amount and the address to which we are sending the token, we also specified the account from which our wallet should debit, and also the gas fee which is the service charge for every transaction performed in the blockchain.
If our transfer went through we sent an alert saying that our transfer was successful and then returned our balance using the getBalance method of which we are going to implement next. If the transaction was not successful, we also alerted a message to the user saying the transfer did not go through and console the error message; this way the developer can debug the issue and give a fix where needed.
Let's do the last pending method which is getting the token balance. In your app.js file, write the following code:
App = {
    web3Provider: null,
    contracts: {},
    web3js: null,

    init: function() {
        return App.initWeb3()
    },

    initWeb3: async function() {
        if(typeof window.ethereum !== 'undefined'){
            App.web3Provider = window['ethereum']
        }
        App.web3js = new Web3(App.web3Provider)
        return App.initContract()
    },

    initContract: function(){
        $.getJSON("TutorialToken", function (data) {
            var TutorialTokenArtifact = data
            App.contracts.TutorialToken = TruffleContract(TutorialTokenArtifact)
            App.contracts.TutorialToken.setProvider(App.web3Provider)
            return App.getBalances()
        })
        return App.bindEvents()
    },

    bindEvents: function(){
        $(document).on('click', '#transferButton', App.handleTransfer)
    },

    handleTransfer: function(event){
        event.preventDefault()

        var amount = parseInt($('#TTTransferAmount').val())
        var toAddress = $('#TTTransferAddress').val()
        var tutorialTokenInstance

        App.web3js.eth.getAccounts(function(error, accounts) {
            if(error){
                console.log(error)
            }
            var account = accounts[0]

            App.contracts.TutorialToken.deployed()
            .then(function(instance) {
                tutorialTokenInstance = instance
                return tutorialTokenInstance.transfer(toAddress, amount, { from: account, gas: 100000})
            })
            .then(function(){
                alert('Transfer Successful!')
                return App.getBalances()
            })
            .catch(function(err){
                alert('Transfer was not successful')
                console.log(err.message)
            })
        })
    },

    getBalances: function() {
        var tutorialTokenInstance
        App.web3js.eth.getAccounts(function(error, accounts) {
            if(error){
                console.log(error)
            }
            var account = accounts[0]
            App.contracts.TutorialToken.deployed()
            .then(function(instance){
                tutorialTokenInstance = instance
                return tutorialTokenInstance.balanceOf(account)
            })
            .then(function(result){
                balance = result.c[0]
                $('#TTBalance').text(balance)
            })
            .catch(function(err){
                console.log(err.message)
            })
        })
    }
}
And we are done implementing our get balance method. As you can see, we used a similar method of implementation. All we needed to do was to call the balance of method. It is worth noting that both the transfer function as well as the balance of function are all from the ERC20 token that we inherited from Openzeppelin. I would definitely write on how to build your own ERC 20 next, so be on the lookout.
What we basically did here was access all the accounts provided to us and then pick the first one. We then used the instance of our deployed contract and ran the balance of function on our instance passing the first account as the parameter. This way we would get the token balance of the account returned to us. After that, we update the Id in our HTML where we would store our balance in with the balance available in our contract.
And we are done. Well, almost done, just one last thing. We need to be able to call our App class once the browser load. That's the last part of our JS file.
App = {
    web3Provider: null,
    contracts: {},
    web3js: null,

    init: function() {
        return App.initWeb3()
    },

    initWeb3: async function() {
        if(typeof window.ethereum !== 'undefined'){
            App.web3Provider = window['ethereum']
        }
        App.web3js = new Web3(App.web3Provider)
        return App.initContract()
    },

    initContract: function(){
        $.getJSON("TutorialToken", function (data) {
            var TutorialTokenArtifact = data
            App.contracts.TutorialToken = TruffleContract(TutorialTokenArtifact)
            App.contracts.TutorialToken.setProvider(App.web3Provider)
            return App.getBalances()
        })
        return App.bindEvents()
    },

    bindEvents: function(){
        $(document).on('click', '#transferButton', App.handleTransfer)
    },

    handleTransfer: function(event){
        event.preventDefault()

        var amount = parseInt($('#TTTransferAmount').val())
        var toAddress = $('#TTTransferAddress').val()
        var tutorialTokenInstance

        App.web3js.eth.getAccounts(function(error, accounts) {
            if(error){
                console.log(error)
            }
            var account = accounts[0]

            App.contracts.TutorialToken.deployed()
            .then(function(instance) {
                tutorialTokenInstance = instance
                return tutorialTokenInstance.transfer(toAddress, amount, { from: account, gas: 100000})
            })
            .then(function(){
                alert('Transfer Successful!')
                return App.getBalances()
            })
            .catch(function(err){
                alert('Transfer was not successful')
                console.log(err.message)
            })
        })
    },

    getBalances: function() {
        var tutorialTokenInstance
        App.web3js.eth.getAccounts(function(error, accounts) {
            if(error){
                console.log(error)
            }
            var account = accounts[0]
            App.contracts.TutorialToken.deployed()
            .then(function(instance){
                tutorialTokenInstance = instance
                return tutorialTokenInstance.balanceOf(account)
            })
            .then(function(result){
                balance = result.c[0]
                $('#TTBalance').text(balance)
            })
            .catch(function(err){
                console.log(err.message)
            })
        })
    }
}

$(function() {
    $(window).load(function() {
        App.init()
    })
})
And we are doneeeeeeeeeeeeeeeeeeeeee.

Let's go ahead and start our wallet. Just before we do that, we would be needing one more package: lite-server. lite-server is a lightweight development web server with support for Single Page Apps (SPAs). Actually, it is a bit more technical than that. But, for our purposes, that’s good enough.
Lite-server is a dev dependency, so we would install it like one. Go ahead and in your terminal, type: npm install lite-server --save-dev or npm i -D lite-server. Once it is done installing, add it to your script tags in your package.json file like below:
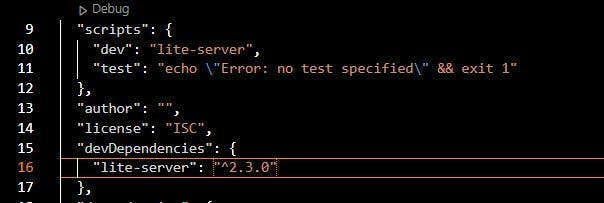
Now let's test our wallet system. Open your terminal and write 'npm run dev'. It should launch the server, and once it is done, do well to connect and log in to your Metamask.
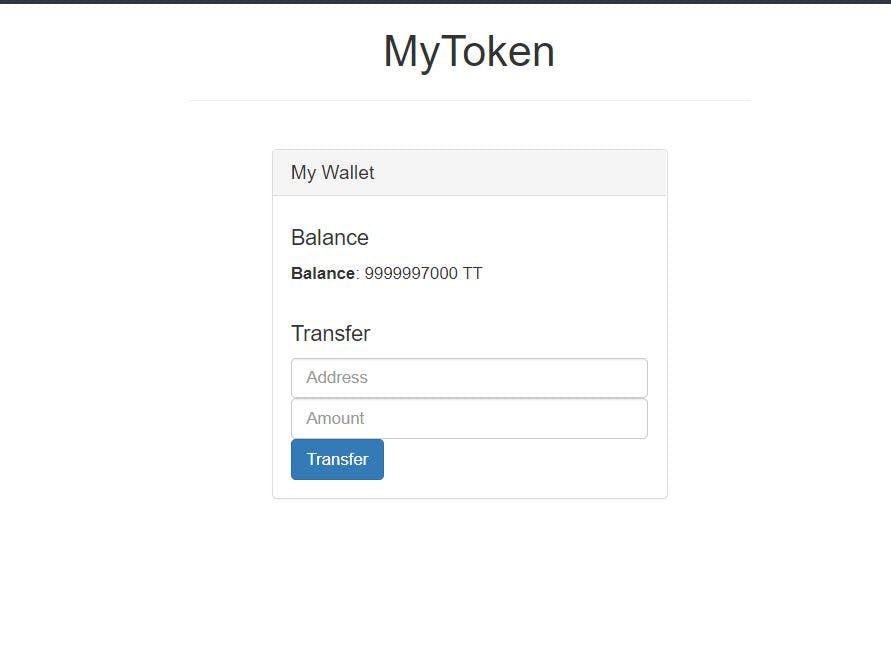

Isn't it amazing. Well, it is actually. Just before you say anything, you might be wondering where the balance '9999997000 ' came from. Remember when we were writing our smart contract, we initialized out initial value and gave it a value, and also when we loaded our token, we loaded it in a way the person deploying the contract (msg.sender) gets the initial supply. So that is how we get the balance value.
uint256 public INITIAL_SUPPLY = 10000000000;

constructor() public {
    _mint(msg.sender, INITIAL_SUPPLY);
  }
If you decide to switch between accounts in your Metamask and reload, you would find the new balance to be 0 as against the initial value, this is because the account is not the same as the account of the person that deployed the contract.
N.B: My value is not exactly 10000000000 because I have already run several test transactions that is why the value has dropped. If you are have not performed any transaction, your balance should be equal to the value of the initial supply.
Now, let us try and make a transfer. Let's transfer some test tokens to our new account, let's say 1000TT. Go to your Metamask and copy the address of a second account, go back to our wallet system and paste the account address in the address input field and 1000 in the amount input field, and then press transfer.
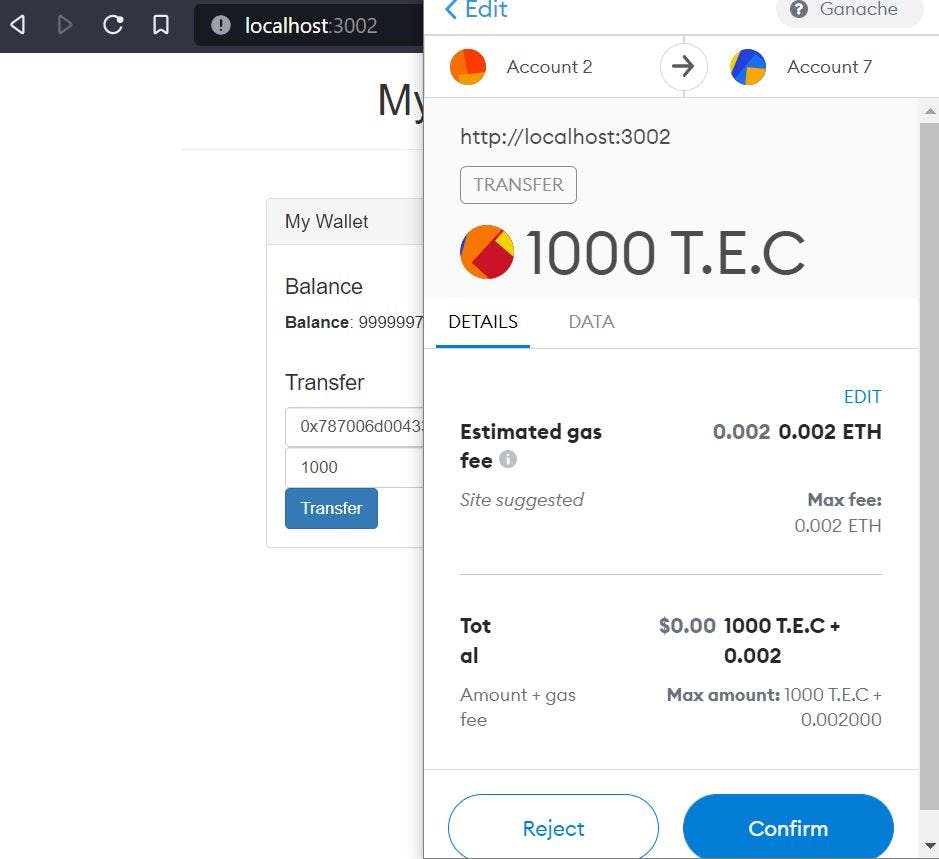
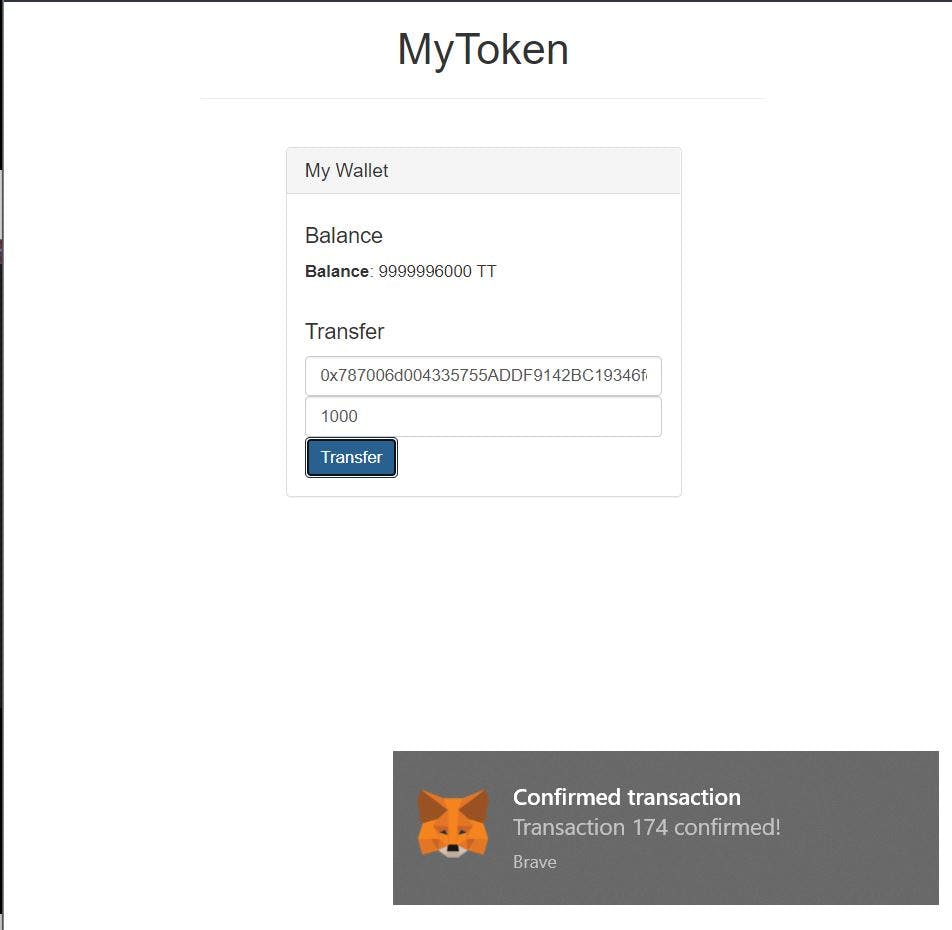
And if you check the other account, you would see that the token is no longer 0 but 1000TT as shown below:
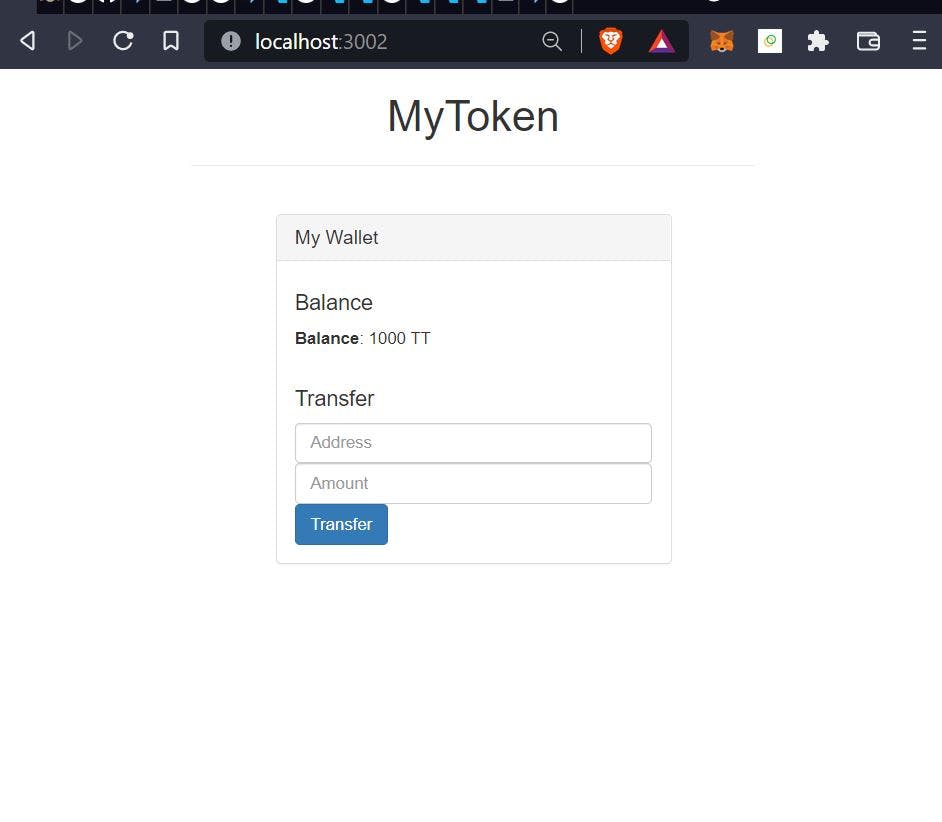
And that's it.

Booooooommmmmmmmmmmmmmm..... And we are done
The whole purpose of the two tutorials is to understand all of the concepts and operations of the blockchain. In the first tutorial we understood the underlying concepts of blockchain, we also built a simple application to drive our explanation. In this second tutorial, we were able to build our simple blockchain wallet from scratch. Not so hard yea? The entire blockchain concept and implementation aren't all that hard, the truth is things get more complicated as you advance, as new information is unfolded to you. But as long as you get the concept right, you can always pull through. In the same way, in blockchain, as long as you can solidify your ground base knowledge, you should be good to go.
There would be more and more related blockchain articles that I would be releasing as the days go. Our next article would definitely be on ERC20. We used two functions or methods that we didn't even define in our code (transfer, balance of) because we inherited them, when the next article comes out, you would understand how to build your own ERC20 token and eventually understand better what we did here.
If you got here and all your programs ran successfully, and you understand all of the terms used in this article, I say a big well done to you. If you didn't, kindly drop a comment, I would be happy to answer them for you.
Here is the link to the Github repository, just in case you had an issue along the line, you can always refer to the link.
Like, share, share, share, share, and shareeeeeeeeeeeeeeeeeeeee...
You can also connect with me on Twitter and LinkedIn. Ese oo