How to Extract text content from uploaded PDF and store in MongoDB database using Node.js (5 Easy Steps)


So I started working on a Machine Learning project recently, and part of the feature required that I be able to upload a file, extract PDF contents, and store both the book and the text content in a database (MongoDB in this case). Although I saw articles on how to parse PDF files, they were not efficient enough to help me achieve what I have set to do. That is why I decided to write about how I went about this project in straightforward but well-detailed steps. Who is excited???

Although this text extraction method is not limited to only PDFs, it also works on other document types such as Microsoft word, e.t.c. But then this project makes use of PDFs, and so this article would be on it too.
Tons of millions of text are buried into PDF documentation, be it in the form of a report, documents, e.t.c Extracting text out of PDF is necessary for further data processing; in fact, there are many ways in which text extraction can be used. Just as you know, I am using this to build a data solution.
Well, looks pretty easy, right... Although it isn't entirely so. This is because PDFs are structured primarily for reading and printing purposes. As a result of these, PDF stores data in a very complex format. It makes use of embedded fonts, custom spacing. What we see as simple text in PDF is actually embedded font, making it more difficult to extract text from PDF. SO LET'S JUMP RIGHT IN

Before we begin learning and writing the codes, I'd like us to understand both the environment as well as the libraries required.
For this project, we would be working in a Node.js environment with libraries such as pdf-parse, dotenv, ejs, express, mongoose, Multer.
Node.js
Node.js is a JavaScript library used for back-end development. Node.js is non-blocking I/O, so it is very efficient when working with files, regardless of how big the files are. Node. js is primarily used for non-blocking, event-driven servers due to its single-threaded nature. It's used for traditional websites and back-end API services but was designed with real-time, push-based architectures in mind.
Dotenv
The dotenv is a zero-dependency module that loads environment variables from a .env file into process.env. Dotenv allows you to separate secrets from your source code. This is useful, especially in a collaborative environment (work, open-source, e.t.c) where you may not want to share your credentials such as database login credentials, OAuth credentials, amongst others.
Express
Express is a minimal and flexible Node.js application framework that provides a robust set of features for web and mobile applications. The primary use of Express is to provide server-side logic for web and mobile applications, and as such, it's used all over the place.
EJS
Embedded Javascript Templating, or EJS as popularly called, is a templating engine used by Node.js. It is a tool for generating web pages that can include dynamic data. It helps the developer create HTML templates with minimal code.
mongoose
Mongoose is an Object Data Modeling (ODM) library for MongoDB and Node. js. It manages relationships between data, provides schema validation, and is used to translate between objects in code and the representation of those objects in MongoDB.
Multer
Multer is a Node. js middleware is used for handling multipart/form-data, which is primarily used for uploading files. Middlewares are functions that have access to the request object (req), the response object (res), and also the next middleware function in the application's request-response cycle. Middlewares are used to modify request and response objects for tasks such as parsing request bodies, adding response headers, e.t.c.
pdf-parse
pdf-parse is a node.js dependency that is used to extract data from pdf documents.
CODE TIME!

The first step we are going to do is to initialize our node.js project using the npm command. Open your command prompt and navigate to the directory you want to carry out this project from. write
npm init -y
This is the visual output for the "npm init -y" command that you entered.
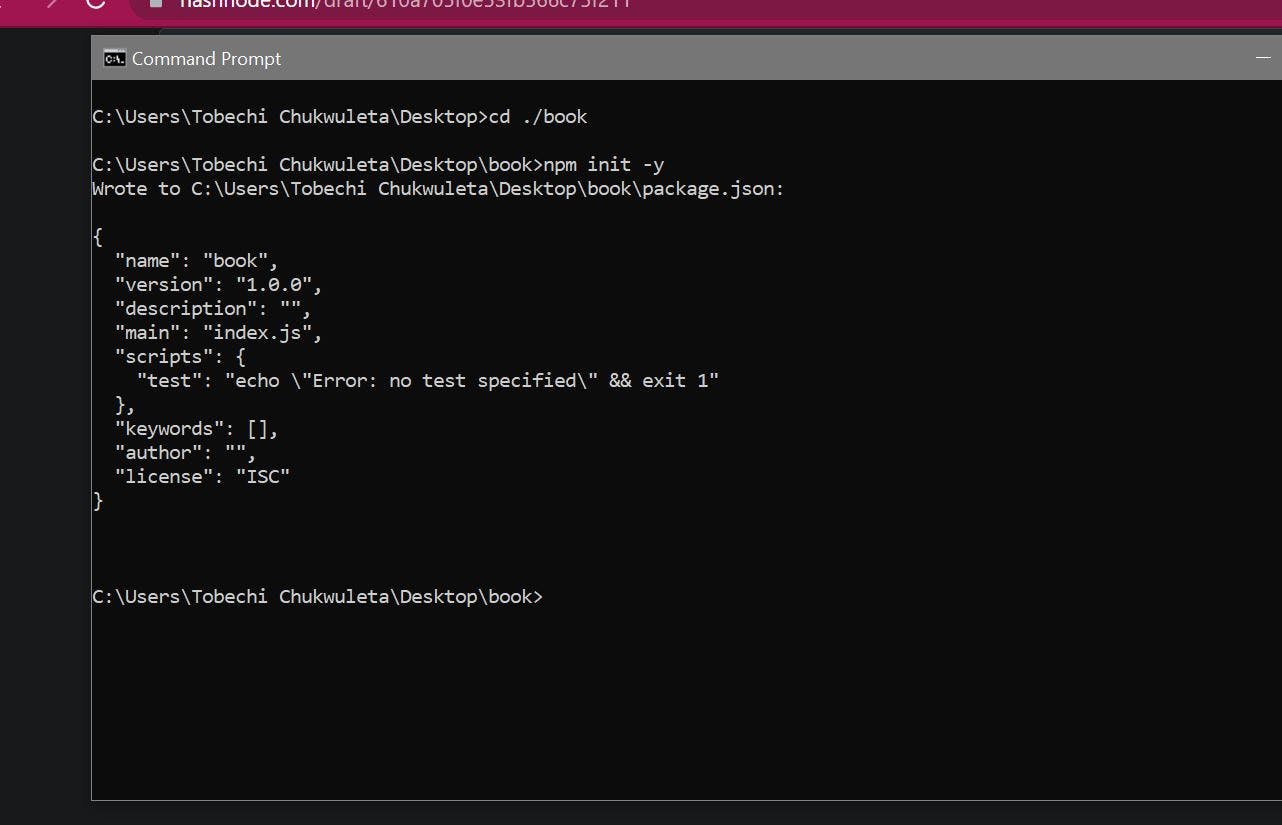
This initializes an npm project on which we would be writing our code. To continue, open your visual studio code editor or any other editor you use to code. When your editor opens, you'd see a file called package.json file. This file contains all necessary information and command used to establish the project.
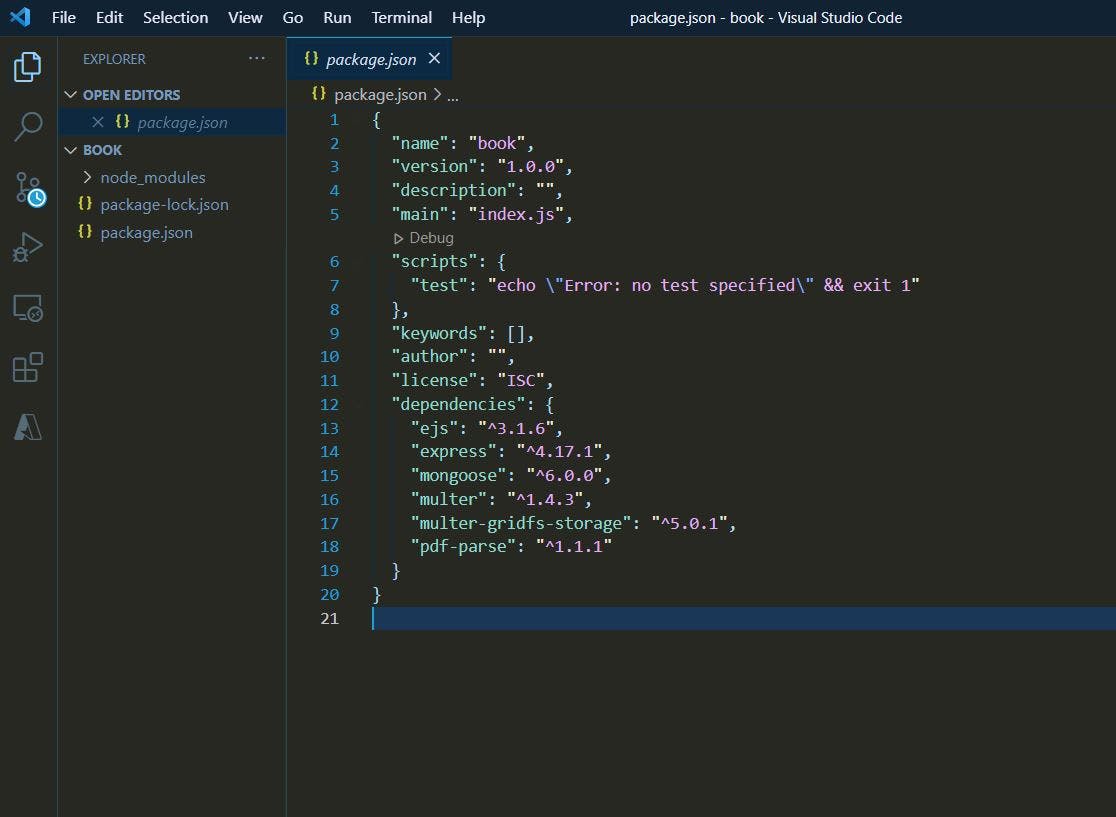
Our next step is to install the packages listed above. Open your terminal. If you are using Visual Studio code editor, the shortcut for opening the terminal is 'ctrl + `'. Once the terminal is open, we can install our dependencies by typing the commands below in our terminal.
npm i ejs express mongoose multer multer-gridfs-storage pdf-parse
You'd see a new folder called node_modules and an extra file (package-lock.json) created. Your package.json file would be updated now looking like this:
Let us create a new file, name it the index.js file. This is the file we would write our code that would be required to start up and keep our server running.
const express = require('express')
const mongoose = require('mongoose')
const fs = require('fs')
const path = require('path')
const dotenv = require('dotenv')
dotenv.config()
In the above code, we are basically calling forth all the dependencies we would need for this project. First, we required to express, which would be used to create our server; we also required mongoose. As earlier discussed, the mongoose is Node.js and MongoDB ODM; we would be using it to connect to our database. This is important as we would be storing the content extracted from the pdf in a database. Next, we required fs which is the short form for file-system. This library gives us access to our local computer; the path file allows us to navigate through our local computer. We then required dotenv so that we would be able to use our credentials, and it would not be visible to all but the developer.
const app = express()
const dotenv = require('dotenv')
dotenv.config()

mongoose.connect(`${process.env.START_MONGODB}${process.env.MONGODB_USERNAME}:${process.env.MONGODB_PASSWORD}${process.env.END_MONGODB}`, { useNewUrlParser: true, useUnifiedTopology: true })
.then(() => {
    console.log('Nanana')
})
.catch((e) => {
    console.log(e)
})

app.use(express.urlencoded({ extended: true }))

app.set('views', path.join(__dirname, 'views'))
app.set('view engine', 'ejs')
app.use(express.static(`${__dirname}/public`))
To explain the above, the first thing we did was to create an instance of our express dependency and store it in a variable called 'app.' We connected to our database; here, we connected online via mongo atlas. To learn more about how to do this, click here.
We then included out different middleware, defined the path to our views folder, and told the program that we would be using ejs as our template engine to write our frontend code (There isn't much to the coding, but you get the drill). We also noted that all other static files (e.g. CSS files, images, JavaScript files, e.t.c) would be included in the public folder.
const port = process.env.PORT || 9000
app.listen(port, () => {
    console.log(`Application is listening on port ${port}`)
})
Here we defined our port. As you can see, port was defined here:
const port = process.env.PORT || 9000
What this means was to tell our node server to go to the .env file and look for 'PORT" and run the server on the port number that 'PORT' was defined to; if no 'PORT' was found in the .env file, then use number 9000 as the port number. The 'app.listen' allows us to run our server, making the server listen on whatever port is defined.
To run the server, open the command prompt and type the command, then press enter.
node index.js
The server starts, and you can go to your port; at the moment you would see an error saying 'cannot GET /,' this is so because we have not defined our routes; we are just testing our server to ensure all is working. 'index.js' in the above is due to the fact that our server-side code can be found in the index.js file. So assuming you saved your file with a different name, e.g. server.js, tobe.js; for you to be able to run the server, you'd need to type:
node whateveryourfilenameis.js
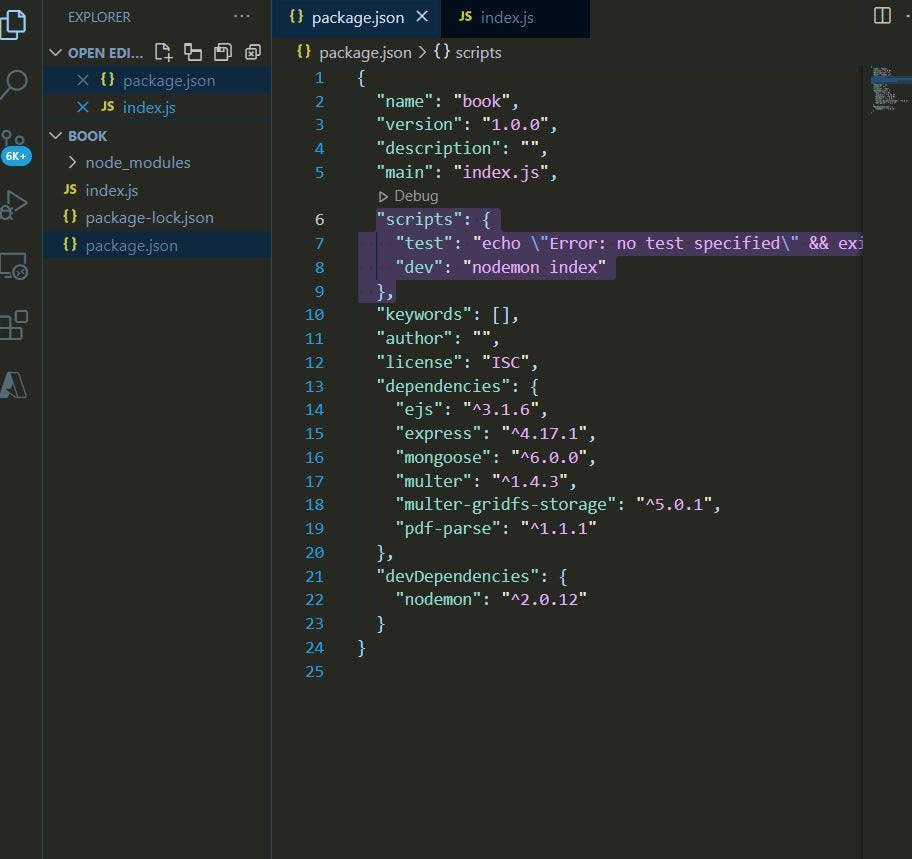
A little thing we need to know is, whenever we write code in our application, for us to see what we wrote, we would need to restart the server by pressing 'Ctrl + c' and running node index.js. This isn't time-efficient, and it actually slows down the productivity level of the developer. To overthrow this, there is developer dependency (nodemon) that allows us to solve this. Basically, when using nodemon, we just need to start our server once, and for every time we make changes to our code, nodemon refreshes our server for us, saving us time. To add nodemon to this project, all you have to do is to install it using the following command:
npm i -D nodemon
Nodemon is a development dependency that is the reason for adding the '-D' to our command. Once you are done installing it, you'd see that it has been added to your package.json file, and it was added in the dev dependency section. Go to your package.json file and add the nodemon command to the script section just like this:
"scripts": {
    "test": "echo \"Error: no test specified\" && exit 1",
    "dev": "nodemon index"
  }
So that your package.json file now looks like this.
To run the server, all you have to do is type:
npm run dev
This starts your server using nodemon, and notice for every change you make to your code, even add an extra space to your code, your server automatically restarts. Good right... Let's move
Remember, when we first started the server using 'node index.js,' we encountered an error saying 'cannot GET /', now we are going to create our routes.
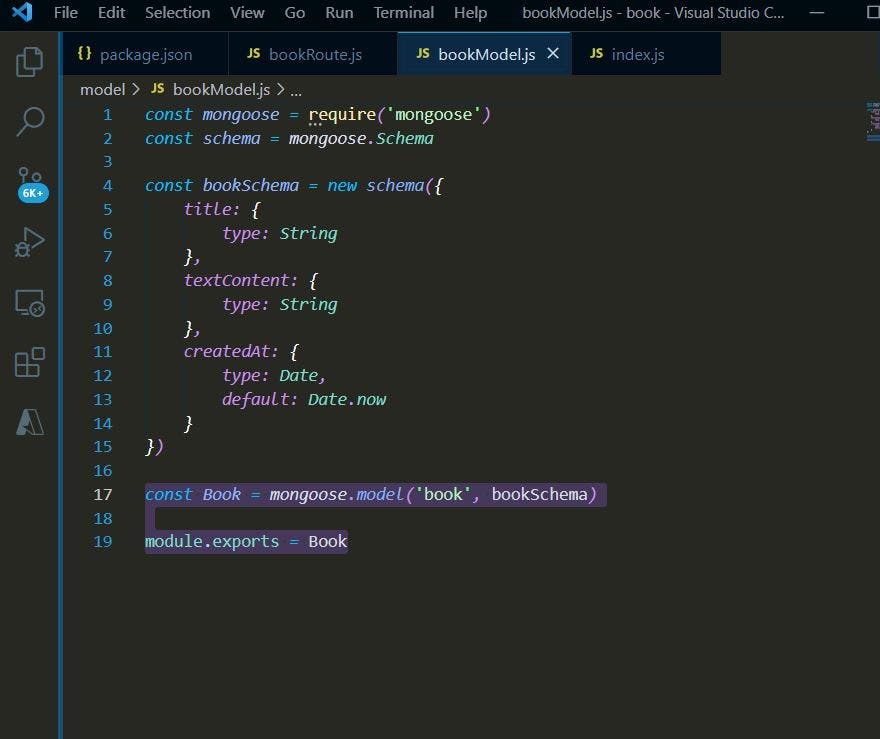
But before we do that, let's create our model. In your project folder, create a folder called model, and inside the folder, create a file and name it whatever you want to name it; in my case, I'd call it 'bookModel.js.' The first thing we would do is to require the dependencies we would be using, and in my case, this would be mongoose. Also, we would be adding a schema object, and we would be getting this schema package from the mongoose package.
const mongoose = require('mongoose')
const schema = mongoose.Schema
Hereafter, we would be defining the structure of our model (schema), and for the sake of this project, we would need three pieces of information: the title, the text content, and the date we extracted the information from our document (pdf). To do this, we would be creating an instance of our schema object and storing the information in a variable called book schema
const bookSchema = new schema({
    title: {
        type: String
    },
    textContent: {
        type: String
    },
    createdAt: {
        type: Date,
        default: Date.now
    }
})
Now that we have defined our schema, we then create our model using the following code, and then after, we export our bookModel.js file so that we can use it in another file.
const Book = mongoose.model('book', bookSchema)

module.exports = Book
So that our book model looks like this:
Now let's create our route...
In your project folder, create another folder and call it routes... In your routes folder, create a file and name it whatever you want, but in our case, I would call it 'bookRoute.js.'
const express = require('express')
const Book = require('../model/bookModel')
const router = express.Router()

router.get('/', (req, res) => {
    res.status(200).render('book.ejs')
})

module.exports = router
Here we are requiring our express package, but in this case, we are going to make use of our router object in the express package, which would basically allow us to create our route. We also required our Book model from our bookModel.js file. We would need this as this is how we would be saving the content of our book. We created our first route '/', which is basically the index page of our project. Besides the route, we call a function (usually called or known as a callback function), which contains two parameters; req (short for request), res (short for response). The req object is used to ask for content from our client-side. For example, when we fill in a form (sign up or sign in form) and we click the submit or register or whatever button, it is through the request object that we are able to retrieve the content of the form or whatever we are submitting on the frontend. Response on the other hand is used to send back content from the server to the client side. For the above code, we see that we are sending a status code of 200 (which means okay) and we are also rendering an ejs file; so that for every time that the route '/' is called forth, the server returns the ejs file to be displayed on the client-side. Let's create this file. We then export our router file as we did for our model file. This way also, another file has access to the particular file.
Finally, to be able to see something on our front end, let's create a view. Still, in the same project folder, create a folder called 'views', and in the 'views' folder create a file, book.ejs, this name is particularly given to match the name we rendered in our routes file. Since we are not focusing on the client-side, I would just paste the code for you guys without explaining.
<!doctype html>
<html>
<head>
<title>Story Books</title>
<link rel = "stylesheet"
href = "https://fonts.googleapis.com/icon?family=Material+Icons">
<link rel = "stylesheet"
href = "https://cdnjs.cloudflare.com/ajax/libs/materialize/0.97.3/css/materialize.min.css">
<script type = "text/javascript"
src = "https://code.jquery.com/jquery-2.1.1.min.js"></script>
<script src = "https://cdnjs.cloudflare.com/ajax/libs/materialize/0.97.3/js/materialize.min.js">
</script>
</head>
<body class = "container">
<div class = "row">
<form class = "col s12" action="/bookie" method="POST" enctype="multipart/form-data">
<div class = "row">
<div class = "file-field input-field">
<div class = "btn">
<span>Browse</span>
<input type = "file" name="file" />
</div>
<div class = "file-path-wrapper">
<input class = "file-path validate" type = "text"
placeholder = "Upload file" />
</div>
</div>
</div>
<div class="row">
<button class="btn waves-effect waves-light" style="font-size: 25px;" type="submit">Upload File
</button>
</div>
</form>
</div>
</body>
</html>
})
module.exports = router
The next thing is to include the routes created in your index.js file. To do so, import and call the routes file like this
const bookRoutes = require('./routes/bookRoute')
.
.
.
.
app.use(bookRoutes)
The dots between the two lines above indicate missing code lines, in this case, the missing code lines are your middleware. Just so you know, I placed the 'app.use(bookRoutes)' line just before I declared my port.
Now we can go ahead and test our application. Open your console and in the project directory, enter the following line:
npm run dev
This should run your application. You can go to the address on which you are running your application, and you would see your application looking like this:
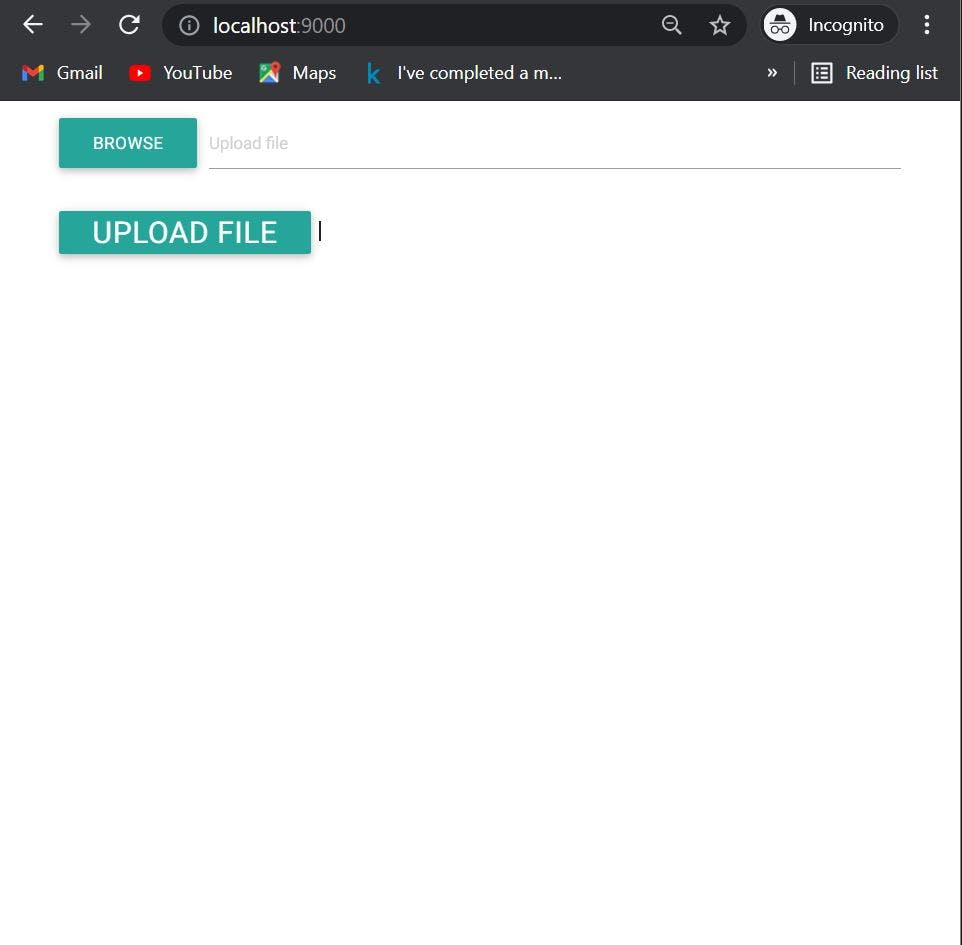
Yayyy... We have done well... You can rest a bit at this point.. lol
Now, let's handle files using upload. Before using Multer to handle the uploads, it's important to understand that the files are never stored in the database. Still, we would the using the database to store some information about the files we are uploading. These files are always stored someplace on the server. In this tutorial, we would store the uploaded file in the public folder. We would also learn how to view those files on the front end.
To start configuring Multer, we need to first configure the disk storage and the naming of the uploaded files.
Multer has an in-built method called diskstorage. This method takes a couple of options. The first option is the destination, This destination option is a callback function that takes three arguments: req: Which is the incoming request object. file: The incoming file object. cb: Another callback function.
We call the cb function which takes in two arguments. The first is 'error' in which we would pass as null. The second argument is the destination folder in which we would save our files.
The second option that the diskstorage method takes is the filename. It is almost the same as the destination option except that in this case, the inner callback function takes the filename as the second argument.
const multerStorage = multer.diskStorage({
    destination: (req, file, cb) => {
        cb(null, 'public/')
    },
    filename: (req, file, cb) => {
        cb(null, file.originalname)
    }
})
Next, we would make a filter that we would use to filter out the different kinds of files. As earlier discussed, this project is focusing on only PDFs and so we would make a filter to only allow only uploads of PDF files.
const multerFilter = (req, file, cb) => {
    if(file.mimetype.split("/")[1] === "pdf"){
        cb(null, true)
    }
    else {
        cb(new Error("Not a PDF file"), false)
    }
}
The last step of our configuration is to call the Multer function and to manually pass the two above functions as options.
const upload = multer({
    storage:  multerStorage,
    fileFilter: multerFilter
)}
Now, we have successfully configured our Multer. If we try to upload a PDF file, you should see the uploaded file in the files folder under the public directory. If you upload any other file that is not PDF, it would show an error.
We are getting closer to the end of our application. Here we are going to write our code in such a way that we would be able to see our book on our front end and also in our database.
Now we are going to extract the content of the pdf and store it in our database. To do that we would be making use of pdfparse to extract the content. The great thing about pdfparse is that it allows you to get so much information from the document. For example, beyond extracting the text content, you can also extract the number of pages from the book. You can also get the title of the book e.t.c.
For this project, we are just going to be extracting the title and the contents of the PDF and storing the information in the database. Here is the code to do that.
router.post('/bookie', upload.single('file'), async (req, res) => {
    // console.log(req.file)

    const pdffile = fs.readFileSync(path.resolve(__dirname, `../public/${req.file.originalname}`))
    pdfparse(pdffile)
    .then((data) => {
        console.log(data.numpages)
        const book = new Book({
            title: req.file.filename,
            textContent: data.text
        })
        book.save()
        .then((cho) => {
            console.log(cho)
            res.status(201).json({
                message: "Book uploaded successfully",
                uploadedBook: {
                    name: cho.title,
                    text: cho.textContent,
                    _id: cho._id
                }
            })
        })
        .catch((e) => {
            // console.log(e)
            res.status(500).json({
                error: e
            })
        })
    })
})
Here we start first by declaring the route which is the same as the form we wrote for our front end. Before the callback function, we passed our Multer configuration and allowed for only a single upload.
We then read the file saved in our public directory and store it in a variable which we called pdffile. Then we called the pdfparse method on the pdffile.
As you can see, we were able to extract certain attributes of our PDF like the number of pages, the content, and also the title of the PDF.
We then created an instance of our database model and saved the content we needed for the instance. Finally, we saved the model to our database (Mongo).
The above code is just a function that has req, file, and a callback function as its arguments. We then check if these files are PDFs, if so we would pass true in the callback function. If it isn't a PDF, we would pass false alongside an error in the callback function.
HEre is out
And now, let us test our application. Here I uploaded a book and here is the output.
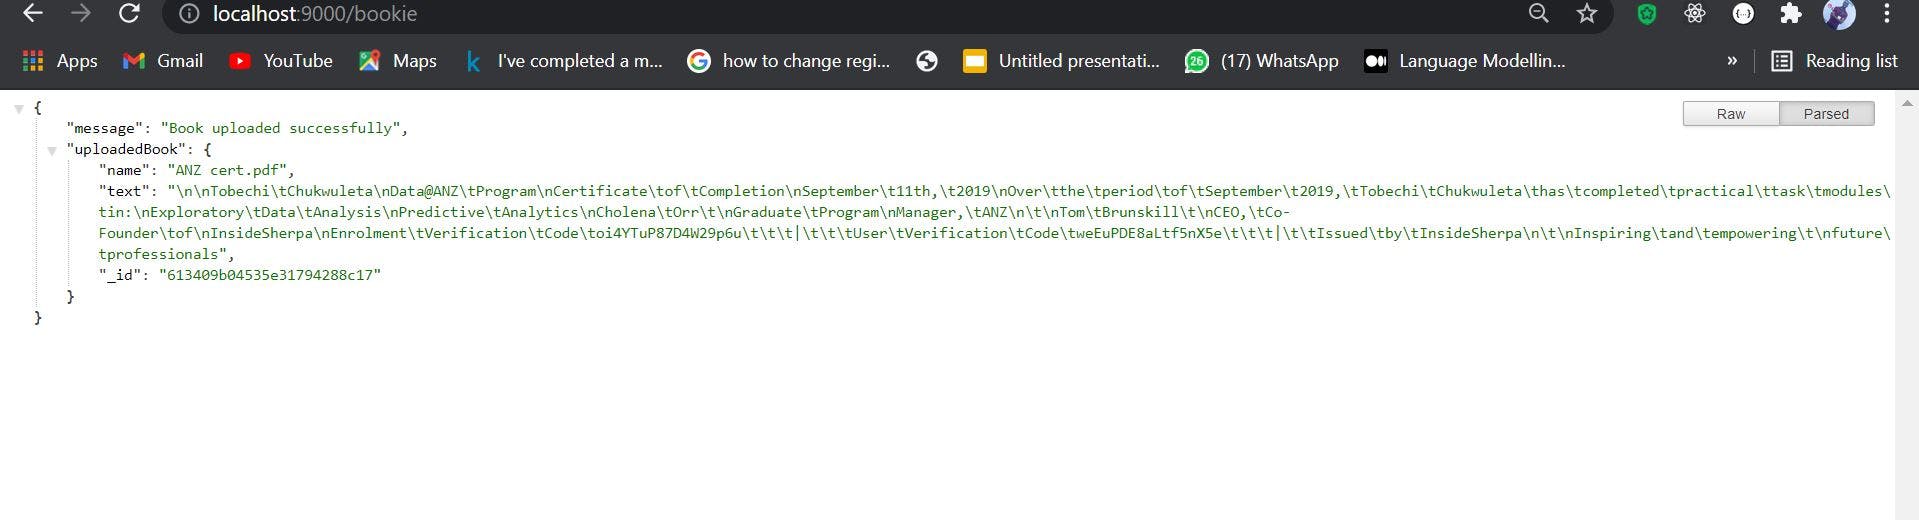
I can go ahead and use the output of the data and perform whatever analysis that I want to since I now have the content of the PDF extracted as plain text.
Here is our entire bookRoute.js file
const express = require('express')
const Book = require('../model/bookModel')
const pdfparse = require('pdf-parse')
const fs = require('fs')
const multer = require('multer')
const path = require('path')
const router = express.Router()

// Config for multer
// const upload = multer({ dest: "public/files "})
const multerStorage = multer.diskStorage({
    destination: (req, file, cb) => {
        cb(null, 'public/')
    },
    filename: (req, file, cb) => {
        cb(null, file.originalname)
    }
})

const multerFilter = (req, file, cb) => {
    if(file.mimetype.split('/')[1] === 'pdf' || file.mimetype.split('/')[1] === 'docx'){
        cb(null, true)
    }
    else {
        cb(new Error('Not a document File'), false)
    }
}

const upload = multer({
    storage: multerStorage,
    fileFilter: multerFilter
})

router.get('/', (req, res) => {
    res.status(200).render('book.ejs')
})

router.post('/bookie', upload.single('file'), async (req, res) => {
    // console.log(req.file)
    const pdffile = fs.readFileSync(path.resolve(__dirname, `../public/${req.file.originalname}`))
    pdfparse(pdffile)
    .then((data) => {
        console.log(data.numpages)
        const book = new Book({
            title: req.file.filename,
            textContent: data.text
        })
        book.save()
        .then((cho) => {
            console.log(cho)
            res.status(201).json({
                message: "Book uploaded successfully",
                uploadedBook: {
                    name: cho.title,
                    text: cho.textContent,
                    _id: cho._id
                }
            })
        })
        .catch((e) => {
            // console.log(e)
            res.status(500).json({
                error: e
            })
        })
    })
})

module.exports = router
One more thing... I know the title was misleading with the 5 easy steps (lol)... I understand people are in a hurry to get things done; this was this goal. Also, I wanted to ensure that my readers were not just after the steps but then to make sure that they understood everything that was being done.
Thank you so much, guys... I would be dropping more content soon, so stay on tabs, guys.
In the meantime you can reach me via Twitter, or LinkedIn